A Burning Paper Shader
After a long hiatus, I’ve decided to start posting again! And I can think of no better way to kick that off than with revisiting a cheesy old shader that I posted 2 years ago.
So today we’re revisitng the “Dissolve” shader effect. I’ve seen this effect pop up more and more lately, mostly on 2D elements ( like in Hearthstone and Armello ), so today we’re going to see what we can get working on a plane, and then torch an unsuspecting 3D fence.
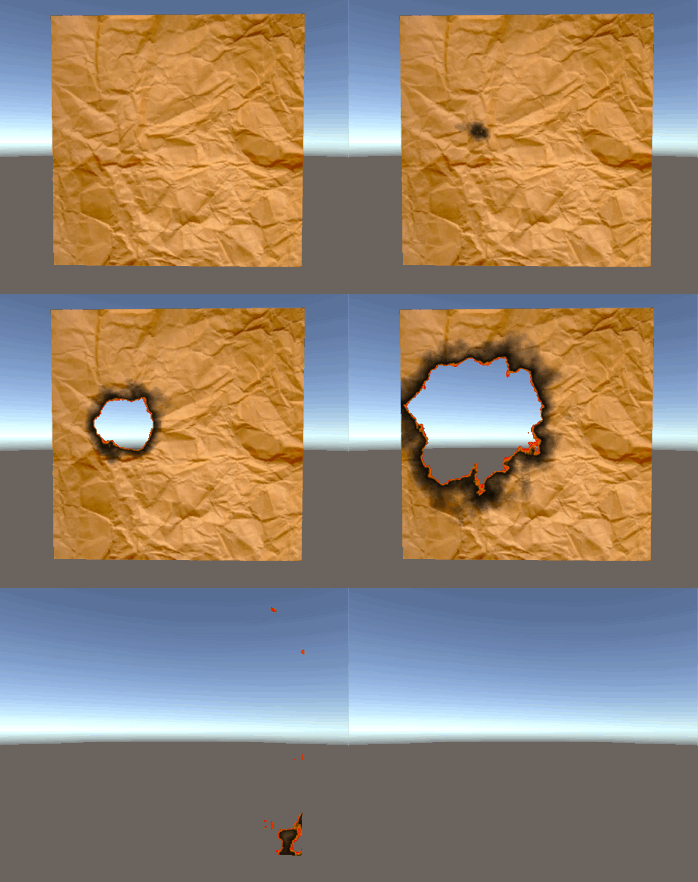
Ok, enough intro! Let’s take a look at what we’re building:
Breaking things down
To start, let’s get the core part of the effect down: dissolving a mesh based on a texture. This is the easiest part to get right, since there really isn’t any need for artistic interpretation. You probably noticed that the above gif starts dissolving from one point and works it’s way across the quad.We’ll get to that, but lets dissolve the entire quad uniformly first. Like so:
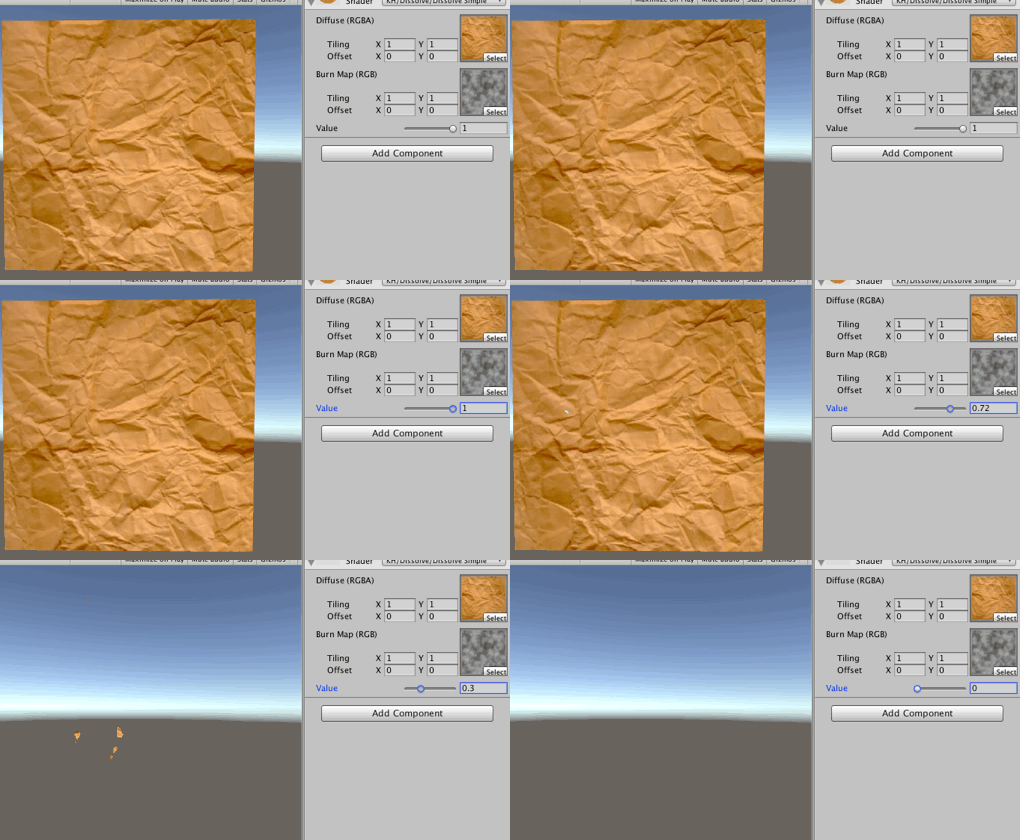
All we need to achieve this is a texture to use as our dissolve control texture. This can be anything (and in some cases using the diffuse texture of the object yields really cool results), but for the most general purpose control texture, use a smoothed noise texture. You can google around for these, or create your own. One thing you’re going to want to look for is one with a reasonably good contrast, which is going to give you a really nice range for your dissolve effect.
Before we write any code, let’s get our math sorted out first. We want to expose a constant value which controls the dissolve effect (0 for completely dissolved, 1 for totally not dissolved), which I’m going to refer to as _DissolveValue for the rest of the post. Then we need to look up the colour value in the control texture for the fragment we’re currently shading and add that value to _DissolveValue. This gets us the following:
- Before the effect starts (_DissolveValue == 1), at pure black in the noise texture, our sum will be 1
- When the effect ends (_DissolveValue == 0), at pure white in our noise texture, our sum will be 1
Since we want to make sure that at the end, every pixel is transparent, we need to clamp our noise value to a maximum of 0.99, which will allow us to make the blanket statement that we can set any pixel who’s sum is < 1 to transparent.
As a fragment function, the above logic might look like this:
fixed4 frag(vOUT i) : COLOR
{
   fixed4 mainTex = tex2D(_MainTex, i.uv);
   fixed noiseVal = tex2D(_NoiseTex, i.uv).r;
   mainTex.a *= floor(_DissolveVal + min(0.99,noiseVal.r));
   return mainTex;
}
For brevity’s sake I’m going to omit posting the whole shader source as we work through it, but the full source is at the bottom of this article so if you’re stuck just jump down there and fill in any blanks.
The Edge Details
Ok, so we have our basic effect now, but it doesn’t really look like anything other than a janky shader effect, and I’ve found that in general “janky shader” isn’t high up on the things commonly asked for by artists. Let’s add some colour to the edges of the dissolve effect.
To do this, we’re going to use a gradient to control the colours of the edge, and we’ll use the alpha channel of that gradient to control our fragment’s alpha as the effect progresses. The leftmost pixel in the gradient will be our fully dissolved value, with an alpha of 0, while the rightmost pixel will be a completely untouched pixel with alpha of 1 and a colour value of white. What you put in between these two values is up to you, but for the effect I’m building, my gradient looks like this:

Instead of multiplying our alpha as we did before, this time we’re going to multiply the entire colour value of our pixel by a point in our gradient. As before, we want to make sure that a _DissolveValue of 1 is a fully untouched mesh, and when it’s 0, we have a fully transparent mesh. This changes our requirements for our math a little bit since we can’t just floor the sum and get a hard line between 1 and <1. We need to make sure that when _DissolveValue is 1, we are at an X value of 1, regardless of our noise texture, but we still want to make sure that at a _DissolveValue of 0 that we’re at an X value of 0 regardless of the value in our noise texture.
This might sound tricky, but it isn’t as long as you set the wrap mode of your gradient to “clamp,” so that we can get values outside the range of 0 and 1.Provided that’s set up correctly, the following will work just fine:
fixed4 frag(vOUT i) : COLOR
{
   fixed4 mainTex = tex2D(_MainTex, i.uv);
   fixed noiseVal = tex2D(_NoiseTex, i.uv).r;

   fixed d = (2.0 * _DissolveValue + noiseVal) - 1.0;
   fixed overOne = saturate(d * _GradientAdjust);

   fixed4 burn = tex2D(_BurnGradient, float2( overOne, 0.5));
   return mainTex * burn;
}
The _GradientAdjust parameter isn’t necessary to make the effect work, but it provides a great deal of control over how tight you want the edges of your effect to be (just make sure that its value is greater than 1). I found that with the gradient I was using, setting that parameter to 2 produced reasonably good results, which looked like this:
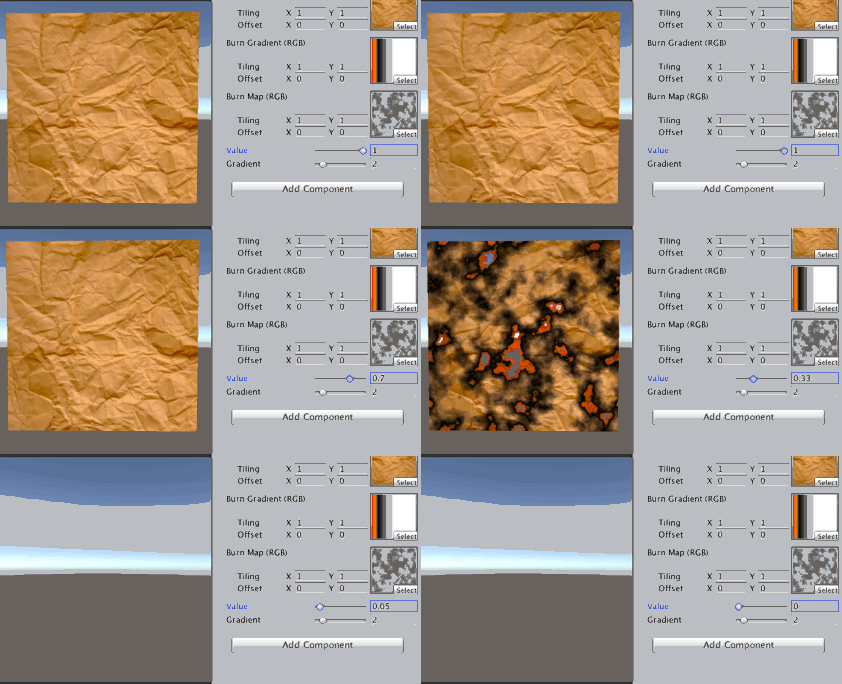
Notice that in the gif above, nothing really happens until we hit about _DissolveValue 0.5. This is dependent on the range of your noise texture, a higher contrast texture will show dissolve effects starting earlier and ending later.
Making This Useful
What we have right now looks pretty good, but it isn’t very useful. I think it’s safe to say that in almost every situation where this effect would look good, it would look way better if the effect came from one direction, or for our purposes today, started at a specific point.
Since we want the dissolve effect to radiate out from a point, what we need to do is define a function which will:
- Return 1 when _DissolveValue is 1
- Return 0 when dissolveValue is 0
- Returns a value between 0 and 1 which approaches 0 and the distance to our origin point decreases
Let’s start from the obvious place and just add the distance to our previous calculation:
GradientXCoord = ((2.0 * _DissolveValue + NoiseTextureValue) * DistanceToPoint) - 1.0
This is as good a place to start as any, but we’re no longer guaranteed to return 1 when _DissolveVal is 1, and if the distance is > 1, the effect gets way less predictable.
The distance problem is probably what you’ll care about more at first, since it makes the _DissolveValue almost useless unless either your distance to the hit point is exceedingly small, or your _DissolveValue is exceedingly small. What we really want is for our distance value to have a range of 0 to 1 as well, which means we need a value to scale our distance by.
Through experimenting a bit, I’ve found that I get pretty good results with the largest distance between any 2 point on the mesh (in object space) divided by 2. As long as your origin point is on your mesh, just divide the distance from each fragment to the origin point by the max distance we’ve calculated to get a much nicer (although not stringly 0.0 - 1.0 in all cases) value.
You can calulate this scaling value with something like this attached to the object you want to use this shader with:
void Start()
{
   float maxVal = 0.0f;
   Material dissolveMaterial = GetComponent<Renderer>().material;
   var verts = GetComponent<MeshFilter>().mesh.vertices;
   for (int i = 0; i < verts.Length; i++)
   {
      var v1 = verts[i];
      for (int j = 0; j < verts.Length; j++)
      {
         if (j == i) continue;
         var v2 = verts[j];
         float mag = (v1-v2).magnitude;
         if ( mag > maxVal ) maxVal = mag;
      }
   }
   dissolveMaterial.SetFloat("_LargestVal", maxVal * 0.5f);
}
Using this value, we can modify our fragment function to look like so:
fixed4 frag(vOUT i) : COLOR
{
   fixed4 mainTex = tex2D(_MainTex, i.uv);
   fixed noiseVal = tex2D(_NoiseTex, i.uv).r;

   fixed toPoint =  (length(i.oPos.xyz - i.hitPos.xyz) / _LargestVal);
   fixed d = ( (2.0 * _DissolveValue + noiseVal) * toPoint ) - 1.0;

   fixed overOne = saturate(d * _GradientAdjust);

   fixed4 burn = tex2D(_BurnGradient, float2(overOne, 0.5));
   return mainTex * burn;
}
This actually is pretty close to our end product, but now we have a new problem: by scaling our distance like this, we no longer can guarantee that we have a fully opaque mesh at _DissolveValue 1. What we need to do is make our divisor smaller for higher values of _DissolveValue, which can be done like so:
fixed4 frag(vOUT i) : COLOR
{
   fixed4 mainTex = tex2D(_MainTex, i.uv);
   fixed noiseVal = tex2D(_NoiseTex, i.uv).r;

   fixed toPoint =  (length(i.oPos.xyz - i.hitPos.xyz) / ((1.0001 - _DissolveValue) * _LargestVal));
   fixed d = ( (_DissolveValue + noiseVal) * toPoint ) - 1.0;

   fixed overOne = saturate(d * _GradientAdjust);

   fixed4 burn = tex2D(_BurnGradient, float2( overOne, 0.5));
   return mainTex * burn;
}
Make sure that whatever number you subtract _DissolveValue from when you do this is greater than the max value that you can set _DissolveValue to, otherwise you risk dividing by 0 at some point in your effect, which can cause all kinds of problems.
With the above fragment function, you now have a perfectly good shader, but I made one additional artistic modification: I multiplied my final toPoint variable by the noise value before calculating d. This helped me avoid having a perfectly circular hole at high values of the _DissolveValue. It’s not necessary, but I think it looks a lot better.
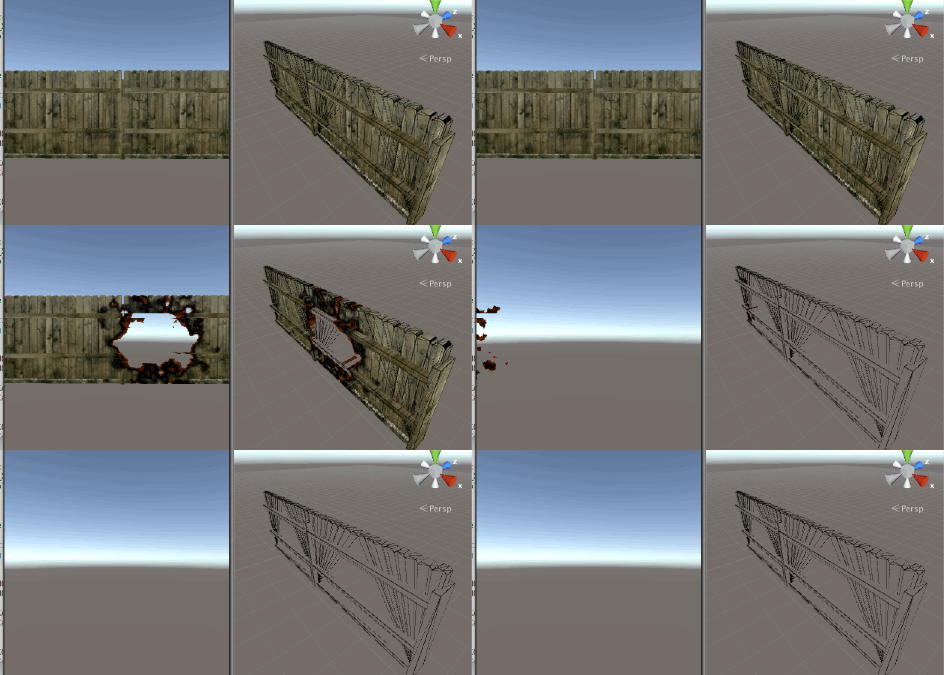
Using the above script / shader, when I applied this shader to an object, the effect I got looked like this:
Practical Implementation Details
Although we have our shader now, we aren’t done. As with a lot of effects, this one is best when it’s driven by some addition cpu side logic. For one, where are we getting our hit point from? Wouldn’t it be awesome if we could drive that by a mouse click and start burning our paper / fence / whatever at whatever point we wanted?
To do that, let’s expand the script we used to set the max value and give it some additional logic. We also will need to modify our above start function to use the variable _dissolveMaterial instead of the one we used before, which was scoped locally to our start function. I’m going to leave that out here, but the full source is available at the end.
private float _value = 1.0f;
private bool _isRunning = false;
private Material _dissolveMaterial = null;
public float timeScale = 1.0f;

public void Reset()
{
   _value = 1.0f;
   _dissolveMaterial.SetFloat("_DissolveValue", _value);
}

public void TriggerDissolve(Vector3 hitPoint)
{
   _value = 1.0f;
   _dissolveMaterial.SetVector("_HitPos", (new Vector4(hitPoint.x, hitPoint.y, hitPoint.z, 1.0f)));
   _isRunning = true;
}

void Update()
{
   if (_isRunning)
   {
      _value = Mathf.Max(0.0f, _value - Time.deltaTime*timeScale);
      _dissolveMaterial.SetFloat("_DissolveValue", _value);
   }
}
With this, assuming that our shader is going to handle transforming the hit point into object space, all we need now is to cast a ray from the point on the screen where our mouse clicks and pass the hitpoint on our object’s collider to this script.
I’m going to handle this in a different script, so that we can put our dissolve script on multiple objects, but only cast 1 ray for all of them:
public class TriggerDissolveOnClick : MonoBehaviour
{
   Vector3 point;
   bool didHit = false;
   DissolveEffect targetEffect;
   void Update ()
   {
      if (Input.GetMouseButton(0))
      {
         RaycastHit hitInfo;
         if (Physics.Raycast(Camera.main.ScreenPointToRay(Input.mousePosition),out hitInfo))
         {
            targetEffect = hitInfo.collider.gameObject.GetComponent<DissolveEffect>();
            if (targetEffect != null)
            {
               didHit = true;
               point = hitInfo.point;
               targetEffect.Reset();
            }
         }
      }
      if (didHit && Input.GetMouseButtonUp(0))
      {
         targetEffect.TriggerDissolve(point);
      }
   }
}
I attached the above script to my main camera (although it isn’t required as long as it’s somewhere in your scene). Once that’s all set up, you can put the DissolveEffect script on any object which uses our dissolve shader, and 1 click will give the the Marvin the Martian treatment:
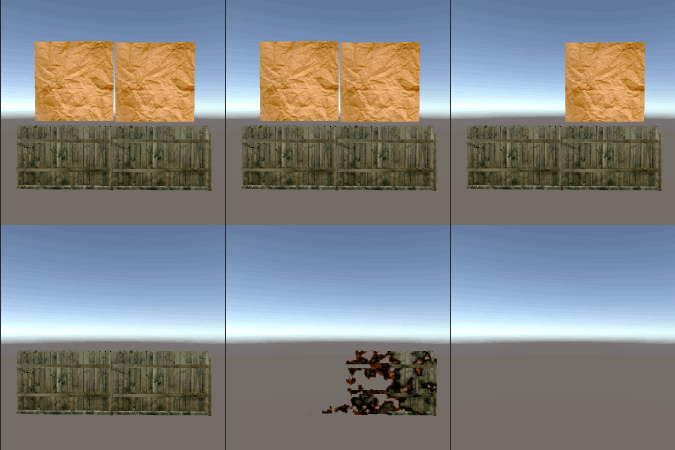
Something to note: if your UVs aren’t set up to handle a seamless texture, you’re going to have a bad time. In cases where the actual texturing of the object requires UVs to be defined with discontinuities (so…pretty much all cases), you’re going to need to find another way to look up your noise texture. Since Unity 5 gives us access to 2 additional UV channels, I recommend trying UV3 or UV4, which will leave your UV2 channel available for lightmapping :)
The source for everything here (scripts and shaders) can be found on google drive here
If you have any questions about anything, spot a mistake, or just want to say hi, send me a message on twitter. Finally I’d like to say thanks to everyone who has emailed me corrections to previous posts, or in some cases code to keep things up to date with new versions of things. I’ll be updating those posts with everything that’s been sent in soon.
Happy shading!