GBA By Example - Drawing and Moving Backgrounds
(Note: This is Part 3 of my GBA by Example series. A list of my other GBA tutorials can be found here)
It’s Tuesday, which means it’s the arbitrary day of the week I chose to post GBA stuff!
Last week we got a sprite on the screen and moving around in a tiled video mode, but it still left our screen looking a little bit bare. This week we’re going to rectify that, and figure out how to work with Backgrounds! You can make really great looking stuff with backgrounds, or you can do what I did, and make something that looks like this:
This is two backgrounds (one gradient, and one checkerboard), overlapping one another, and moving in opposite directions. Snazzy eh? Today we’re going to cover the absolute minimum you need to know to make something like that.
To kick things off, let’s take a look at what a background actually is on the GBA:
Introducing Backgrounds
Like Sprites, Backgrounds are rectangular collections of tiles. Unlike Sprites, they can be really, really big (relatively speaking). If you recall from last week, the largest sprite we can make is 64x64 pixels. Backgrounds can be up to 1024x1024 if we want them to. Since we only have 96k of VRAM on the GBA (and 32k of that is for Sprites), it stands to reason that to fit all our background data in, they look a bit different from Sprites in memory.
Just like with Sprites, all colours in a Background come from a Palette, which is a collection of up to 256 different colours, each stored as a 16 bit unsigned integer. Colours on the GBA are stored with 5 bits per channel, with the highest bit ignored, like this:
inline uint16 MakeCol(uint32 red, uint32 green, uint32 blue)
{
    return red | (green<<5) | (blue<<10);
}
In code, a Palette might be defined like so:
const unsigned short bgPal[4] __attribute__((aligned(4)))=
{
    0x4DA0,0x0000,0xFFFF,0x001F
};
One thing that hasn’t been mentioned in previous articles is that pixels that use the colour at index 0 are treated as transparent, so you only see the index 0 colour if nothing else gets drawn on top of that pixel. This will be important for us today because we’re going to overlap two backgrounds on top of each other.
A Background’s tiles are the same as a Sprite’s: 8x8 rectangular collections of indices, with each of these storing an index from the palette array. Backgrounds use a separate colour palette from sprites, so you can use an entirely different set of colours for your backgrounds than you do for other stuff in your game. This palette memory, just like with sprites, is large enough to store 256 colours. Since we can only have 256 possible values, tiles store each pixel as an 8 bit index. Tiles are laid out row by row, from top to bottom.
In code, that might look like this:
const unsigned short bgTiles[64] __attribute__((aligned(4)))=
{
    0x0101,0x0202,0x0101,0x0202,0x0101,0x0202,0x0101,0x0202,
    ...
};
If you store your tile data in values larger than uint8s, like I did above, remember that the lowest byte in a value is the leftmost pixel.
All of that should be familiar to you if you read last week’s post, but unlike with Sprites, the order of the tiles doesn’t matter when we’re working with backgrounds. This is because backgrounds want to re-use tiles as much as possible. To accomplish this, backgrounds use a third data structure, called a Screen Block, which is a collection of indices into tile memory: One 16 bit value for every 8x8 tile that the background uses.
Screen Blocks are always 32x32 in size, but each of these values represents an 8x8 tile, meaning that backgrounds are made up of one or more blocks of 256x256 pixels.
In code, a Screen Block might look something like this:
const unsigned short checkerBg[1024] =
{
    0x0001,0x0001,0x0001,0x0000,0x0000,0x0000,0x0000,0x0000,
    0x0000,0x0000,0x0000,0x0000,0x0000,0x0000,0x0000,0x0000,
    0x0000,0x0000,0x000A,0x001D,0x0000,0x0000,0x0000,0x0000,
    0x0000,0x0000,0x0000,0x0000,0x0000,0x0000,0x0000,0x0000,

    0x0000,0x0000,0x0000,0x0000,0x0000,0x0000,0x0000,0x0000,
    0x0000,0x0000,0x0000,0x0000,0x0000,0x0000,0x0000,0x0000,
    0x0000,0x0000,0x0000,0x0000,0x0000,0x0000,0x0000,0x0000,
    0x0000,0x0000,0x0000,0x0000,0x0000,0x0000,0x0000,0x0000,

    //continue for another 30 rows
As seen here, Screen Blocks are defined row by row, top to bottom, each value representing the index of a tile. When you’re working with 8bpp tiles, this is all there is to it. There’s more to think about in 4bpp mode, but since this is the first time we’re doing anything with bacgkrounds, let’s keep it simple and continue working in 8bpp mode.
The last thing to know is that we can only have between 0 and 4 backgrounds working at the same time. Yay hardware limitations!
This was a lot of theory, and I want to switch gears now and start to build some stuff, but just to recap:
- A Background is a rectangular collection of 8x8 tiles
- Tiles are stored as arrays of indices into palette memory
- To decide which tile goes where, Backgrounds use Screen Blocks, which are 32x32 arrays of indices into tile memory
- A Background consists of one or more Screen Blocks
- We can use between 0 and 4 backgrounds at any given time
Alright, let’s start putting this into practice!
My Data:
Because Screen Blocks are so large, I’ve uploaded the data (including tiles and palette) that I’m going to use today to github instead of just including it here.
That gist contains all the information needed to get our first background (the checkerboard) onto the screen. We’ll generate the gradient background in code below.
Getting Data into VRAM
We know what our data is going to look like, but we haven’t yet covered where it’s going to go. Let’s start with Palette memory, since it’s going to be the most like what we’ve done before.
As mentioned above, Backgrounds use a different palette than Sprites, which naturally means that the background palette is located at a different place in memory:
#include "tiles.h"

#define MEM_BG_PALETTE    ((uint16*)(0x05000000))
#define MEM_OBJ_PALETTE   ((uint16*)(0x05000200))

void UploadPaletteMem()
{
    memcpy(MEM_BG_PALETTE, bgPal, bgPalLen);
}
Perfect, the palette data was easy! Next we need to get our tiles into memory. You may recall from last week that the data for sprite tiles starts at the fifth tile-block in tile memory. This is because the first 4 of those blocks are reserved for backgrounds. So let’s put our tile data into the first one:
typedef uint16 Tile[32];
typedef Tile TileBlock[256];

#define MEM_VRAM                ((volatile uint32*)0x6000000)
#define MEM_TILE                ((TileBlock*)0x6000000)

void UploadTileMem()
{
    memcpy(&MEM_TILE[0][0], bgTiles, bgTilesLen);
}
All of this is almost identical to last week, so let’s start doing something different and get our Screen Block data into memory. Screen blocks share memory with Tile memory. A Screen Block is 2048 bytes, which means that we can fit 8 of them into a single tile-block. It’s up to us to make sure that we don’t try to put a Screen Block and tile data into the same spot in memory.
If you’re using the example data, you’ll notice that we only have 2 tiles to upload into memory (a checkerboard tile, and a transparent tile), so it’s safe for us to just go 1 Screen Block away from the start of VRAM:
typedef uint16 ScreenBlock[1024];
#define MEM_SCREENBLOCKS        ((ScreenBlock*)0x6000000)

void UploadScreenBlock()
{
    //checkerBg is the ScreenBlock data from the gist
    memcpy(&MEM_SCREENBLOCKS[1], checkerBg, checkerBgLen);
}
That should about do it for uploading the data we have for our tiles, but I also mentioned that I generated the gradient background in code. Here’s the code for that:
inline uint16 MakeCol(uint32 red, uint32 green, uint32 blue)
{
    return red | (green<<5) | (blue<<10);
}

void GenerateGradient()
{
    //we've uploaded 4 colours to palette memory
    //so make sure we don't overwrite those
    for (uint16 i = 0; i < 32; i++)
    {
        *((uint16*)(MEM_BG_PALETTE+(4+i))) = MakeCol(i,i,i);
    }

    //every tile is 64 palette indices
    //we have 32 grayscale values from above
    uint8 tile[64];
    for (uint16 i = 0; i < 32; ++i)
    {
        for (int j = 0; j < 64; j++)
        {
            tile[j] = 4 + (i);
        }
        memcpy(MEM_TILE[1][i], tile, 64);
    }

    //generate 2 screen blocks,
    //each gray value getting two tiles of width
    for (int block = 0; block < 2; ++block)
    {
        uint16 screenBlock[1024];

        //screen block data is row by row, top to bottom
        for (uint16 i = 0; i < 32; ++i)
        {
            for (uint16 j = 0; j < 32; ++j)
            {
                //each block gets 16 colours, 2 tiles wide for each
                screenBlock[i * 32 + j] =  (j/2) + (block*16);
            }
        }
        memcpy(MEM_SCREENBLOCKS[block+2], &screenBlock[0], 2048);
    }
}
I was torn on whether or not to include this in the post, but I think it’s a good example of another way of working with all the types of memory we’re wrangling to get data on the screen. It also gives us an opportunity to work with a background that uses more than 1 Screen Block, since the gradient is 2 Screen Blocks wide.
If the above code is unclear, that’s ok! I don’t think it was particularly common to generate background data like this anyway. If you want to follow along, just copy and paste the above code and pretend we uploaded that data the same way we did the other data, since it has nothing to do with understanding how the GBA handles backgrounds.
Turning Things On
The hard part is officially over! All that’s left now is to tell the hardware to use the data we’re feeding it, and glue all the snippets we have together.
Let’s talk about our friend the display control register (0x04000000), in addition to doing things like setting a video mode, or enabling objects, this value is also used to enable or disable backgrounds.
We get to work with up to four backgrounds at a time on the GBA, and you can enable them like so:
#define VIDEOMODE_0    0x0000
#define BACKGROUND_0   0x0100
#define BACKGROUND_1   0x0200
#define BACKGROUND_3   0x0400
#define BACKGROUND_4   0x0800

#define REG_DISPLAYCONTROL     *((volatile uint16*)(0x04000000))

int main()
{
    REG_DISPLAYCONTROL = VIDEOMODE_0 | BACKGROUND_0 | BACKGROUND_1;
    return 0;
}
We’re only going to use the first two backgrounds today, but you can turn on all four backgrounds, or only 1 and 3, or any other combination that you want to use.
Also, we’re still in VideoMode_0, this is because it’s the easiest tiled mode to understand, and we (I) still don’t know enough to actually use any of the features in the other tiled modes.
If you’re in a bitmap mode, you need to enable Background 2 in order for anything to appear on the screen, but as far as I know, you can’t actually do anything with it, it’s just a flag needed to make bitmap modes work.
Defining Our Backgrounds
Just like with Sprites (err.. Objects that is), we need to set up a few values to define how the hardware should use our background data. Mercifully, backgrounds are actually much easier to work with than Sprites. They only need a single 16 bit value set.
Since there are only 4 backgrounds, these bits are at constant memory locations:
#define REG_BG0_CONTROL        *((volatile uint16*)(0x04000008))
#define REG_BG1_CONTROL        *((volatile uint16*)(0x0400000A))
#define REG_BG2_CONTROL        *((volatile uint16*)(0x0400000C))
#define REG_BG3_CONTROL        *((volatile uint16*)(0x0400000E))
What each bit in these values means is as follows:
| BG | 0x FEDC BA98 7654 3210 |
|---|---|
| FE | Size (defined below) |
| D | Ignored today (see Tonc for info) |
| CBA98 | What Screen Block to start at |
| 7 | Color mode: (1 for 8bpp, 0 for 4bpp) |
| 6 | Ignored today (see Tonc for info) |
| 54 | Nothing, empty bits |
| 32 | Tile Block to use |
| 10 | Z Depth |
Just like with Sprites, the sizes for backgrounds use the bits above to select a value from another table, for backgrounds, this table is as follows:
| Bits | Size (in Tiles) |
|---|---|
| 00 | 32x32 |
| 01 | 64x32 |
| 10 | 32x64 |
| 11 | 64x64 |
Using the above tables, if we wanted to define our first background (the checkerboard), as a 32x32 tile background which uses tiles starting at the first tile block, and uses the second Screen Block (since it’s offset from the start of VRAM to make space for tile memory), we would do the following:
//Size 00, Screen Block 1, Color Mode 1, Tile Block 0, Depth 0
//0000 0001 1000 0000

REG_BG0_CONTROL = 0x0180;
Notice that we want our Z Depth to be 0 as well. The higher this value, the farther back in the drawing order a background is, so a BG at depth 0 will draw on top of backgrounds with any higher values. Since our checkerboard background has the transparent pixels in it, we want it to be drawn on top of whatever will fill in those transparent pixels.
If we put all this together (leaving out the code for the second background), we get:
#include <string.h>
#include "tiles.h"

typedef unsigned char      uint8;
typedef unsigned short     uint16;
typedef unsigned int       uint32;

typedef uint16 ScreenBlock[1024];
typedef uint16 Tile[32];
typedef Tile TileBlock[256];

#define VIDEOMODE_0    0x0000
#define BACKGROUND_0   0x0100

#define REG_DISPLAYCONTROL     *((volatile uint16*)(0x04000000))
#define REG_BG0_CONTROL        *((volatile uint32*)(0x04000008))

#define MEM_VRAM                ((volatile uint32*)0x6000000)
#define MEM_TILE                ((TileBlock*)0x6000000)
#define MEM_SCREENBLOCKS        ((ScreenBlock*)0x6000000)

#define MEM_BG_PALETTE          ((uint16*)(0x05000000))

int main()
{
    //load data
    memcpy(MEM_BG_PALETTE, bgPal, bgPalLen );
    memcpy(&MEM_TILE[0][0], bgTiles, bgTilesLen);
    memcpy(&MEM_SCREENBLOCKS[1], checkerBg, checkerBgLen);

    REG_BG0_CONTROL = 0x0180;// 0000 0001 1000 0000;
    REG_DISPLAYCONTROL =  VIDEOMODE_0 | BACKGROUND_0;

    while(1)
    {
    }
    return 0;
}
And if you run that, you should see:
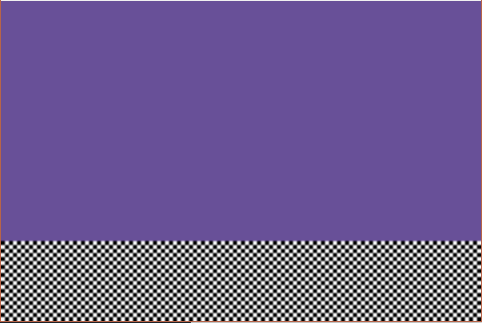
Which is excellent! We officially have our first background on the screen. Let’s add our second one now. Remember that we used 2 Screen Blocks to hold all the values for this background, and we want them laid out horizontally, so we’ll have a 64x32 background. We want it to be at priority 0, and use the data we populated with the gradient generating code above.
// Size 01, Screen Block 2, Color Mode 1, Tile Block 1, Priority 1
 // 0100 0010 1000 0101
REG_BG1_CONTROL = 0x4285;
If we add the above line, and the required #defines and gradient code to what we have, we get the following (I’ve omitted GenerateGradient() function body for brevity). I promise after this to not paste any more large code blocks into the article :)
#include <string.h>
#include "tiles.h"
#include "bg.h"

typedef unsigned char      uint8;
typedef unsigned short     uint16;
typedef unsigned int       uint32;

typedef uint16 ScreenBlock[1024];
typedef uint16 Tile[32];
typedef Tile TileBlock[256];

#define VIDEOMODE_0    0x0000
#define BACKGROUND_0   0x0100
#define BACKGROUND_1   0x0200

#define REG_DISPLAYCONTROL     *((volatile uint16*)(0x04000000))
#define REG_BG0_CONTROL        *((volatile uint16*)(0x04000008))
#define REG_BG1_CONTROL        *((volatile uint16*)(0x0400000A))

#define MEM_VRAM                ((volatile uint32*)0x6000000)
#define MEM_TILE                ((TileBlock*)0x6000000)
#define MEM_SCREENBLOCKS        ((ScreenBlock*)0x6000000)

#define MEM_BG_PALETTE          ((uint16*)(0x05000000))
#define MEM_PALETTE             ((uint16*)(0x05000200))

inline uint16 MakeCol(uint32 red, uint32 green, uint32 blue)
{
    return red | (green<<5) | (blue<<10);
}

void GenerateGradient();

int main()
{
    //load data
    memcpy(MEM_BG_PALETTE, bgPal, bgPalLen );
    memcpy(&MEM_TILE[0][0], bgTiles, bgTilesLen);
    memcpy(&MEM_SCREENBLOCKS[1], checkerBg, checkerBgLen);

    GenerateGradient();

    REG_BG0_CONTROL = 0x0180;// 0000 0001 1000 0000;
    REG_BG1_CONTROL = 0x4285; // 0100 0010 1000 0101
    REG_DISPLAYCONTROL =  VIDEOMODE_0 | BACKGROUND_0 | BACKGROUND_1;
    while(1)
    {
    }
    return 0;
}
If you compile and run the above (filling in the GenerateGradient function), you should end up with this:
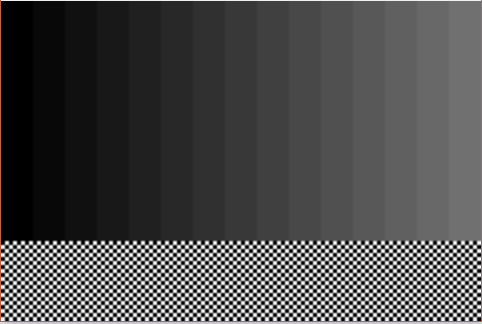
Which is almost exactly what we wanted to end up with when we started! All that’s left is to add some movement, and this is pretty easy to do:
Moving Things Around
In truth, backgrounds don’t really move, your viewport moves over top of the background. This makes sense with 1 background, but it gets a bit abstract when you think about multiple backgrounds moving at once. In essence, all you have to keep in mind is that increasing the X value of the background scrolling register is going to move it to the left, because what you’re doing is actually moving where your screen is to the right. The same is true for the vertical scrolling register.
As you may have guessed from that explanation, each background on the GBA has two additional registers, one for X offset, and one for Y offset. All backgrounds will repeat infinitely as you scroll them, so you can keep incrementing these values at will, without worrying about resetting them when you get to the edge of a background image. These registers are defined as follows:
#define REG_BG0_SCROLL_H       *((volatile uint16*)(0x04000010))
#define REG_BG0_SCROLL_V       *((volatile uint16*)(0x04000012))
#define REG_BG1_SCROLL_H       *((volatile uint16*)(0x04000014))
#define REG_BG1_SCROLL_V       *((volatile uint16*)(0x04000016))
#define REG_BG2_SCROLL_H       *((volatile uint16*)(0x04000018))
#define REG_BG2_SCROLL_V       *((volatile uint16*)(0x0400001A))
#define REG_BG2_SCROLL_H       *((volatile uint16*)(0x0400001C))
#define REG_BG2_SCROLL_V       *((volatile uint16*)(0x0400001E))
These are pretty self explanatory, assign numbers to them to make the corresponding background move. The only weird part about them is that they are Write-Only, so you can’t simply increment the value in one of the registers, nor can you ever read the value in the register, you can just write to it.
Using these registers, it’s trivial to modify our code from earlier to make things scroll. For brevity’s sake, I’m just going to show how to modify the while(1){} section from the above code, rather than paste the whole thing again:
int hScroll = 0;
int h2Scroll = 0;
while(1)
{
    vsync();

    REG_BG0_SCROLL_H = -hScroll;
    REG_BG1_SCROLL_H = h2Scroll;
    h2Scroll +=2;
    hScroll = h2Scroll/3;
}
This is pretty much what you’d expect, background 0 is being assigned a value that is decreasing, which means it should appear to be moving right on the screen (since our viewport is moving left), and vice versa with the gradient background. This matches up with the scroll directions we had at the top of the post. Which is perfect, because that means we’re done!
Conclusion
I suppose I should link you to some tools that can be used to create backgrounds, but I do so only grudgingly, because I don’t think they’re great. Tonc suggests Mappy and MapEd. To be fair, I haven’t written a tile mapping tool so I don’t really have much of a leg to stand on when criticizing these, but I found them rather fiddly to use, which is why I ended up just hand building some really simple ones for this post.
I’d love to hear about better tools for doing this sort of work. I think Tiled might be better, but I don’t know how set up it is for GBA style stuff. In any case, I’d love to hear about what tools might be better on Twitter. See you next week!