Getting Started With Compute Shaders In Unity
I love the simplicity of vert/frag shaders; they only do one thing (push verts and colors to the screen), and they do it exceptionally well, but sometimes, that simplicity feels limiting and you find yourself staring at a loop of matrix calculations happening on your CPU trying desperately to figure out how you could store them in a texture…
…Or maybe that’s just me, but regardless, compute shaders solve that problem, and it turns out that they’re dead simple to use, so I’m going to explain the basics of them today. First I’ll go through the example compute shader that unity auto creates for you, and then I’ll finish off with an example of a compute shader working with a structured buffer of data.

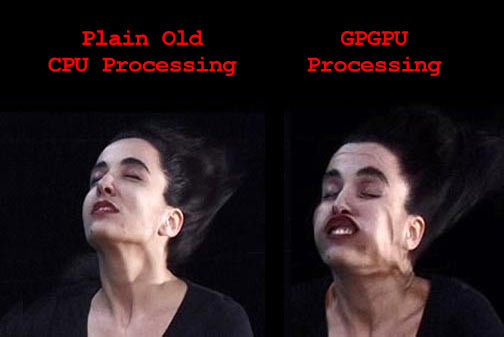
Compute shaders can be used to control the positions of particles
What the Heck is a Compute Shader?
Simply put, a compute shader is a is a program executed on the GPU that doesn’t need to operate on mesh or texture data, works inside the OpenGL or DirectX memory space (unlike OpenCL which has its own memory space), and can output buffers of data or textures and share memory across threads of execution.
Right now Unity only supports DirectX11 compute shaders, but once everyone catches up to OpenGL 4.3, hopefully us mac lovers will get them too :D
This means that this will be my first ever WINDOWS ONLY tutorial. So if you don’t have access to a windows machine, the rest of this probably won’t be helpful.
What are they good for? (and what do they suck at?)
Two words: math and parallelization. Any problem which involves applying the same (no conditional branching) set of calculations to every element in a data set is perfect. The larger the set of calculations, the more you’ll reap the rewards of doing things on your GPU.
Conditional branching really kills your performance because GPUs aren’t optimized to do that, but this is no different from writing vertex and fragment shaders so if you have some experience with them this will be old hat.
There’s also the issue of latency. Getting memory from the GPU back to your CPU takes time, and will likely be your bottleneck when working with compute shaders. This can be somewhat mitigated by ensuring that you optimize your kernels to work on the smallest buffers possible but it will never be totally avoided.
Got it? Good. Let's get started.
Since we’re working with DirectX, Unity’s compute shaders need to be written in HLSL, but it’s pretty much indistinguishable from the other shader languages so if you can write Cg or GLSL you’ll be fine (this was my first time writing HLSL too).
The first thing you need to do is create a new compute shader. Unity’s project panel already has an option for this, so this step is easy. If you open up that file, you’ll see the following auto generated code (i’ve removed the comments for brevity):
#pragma kernel CSMain

RWTexture2D<float4> Result;

[numthreads(8,8,1)]
void CSMain (uint3 id : SV_DispatchThreadID)
{
    Result[id.xy] = float4(id.x & id.y, (id.x & 15)/15.0, (id.y & 15)/15.0, 0.0);
}
This is a really good place to start figuring out compute shaders, so let’s go through it line by line:
#pragma kernel CSMainThis specifies the entry point to the program (essentially the compute shader’s “main”). A single compute shader file can have a number of these functions defined, and you can call whichever one you need from script.
RWTexture2D<float4> Result;This declares a variable that contains data the shader program will work wth. Since we aren’t working with mesh data, you have to explicitly declare what data your compute shader will read and write to. The “RW” in front of the datatype specifies that the shader will both read and write to that variable.
[numthreads(8,8,1)]This line specifies the dimensions of the thread groups being spawned by our compute shader. GPUs take advantage of the massive parallel processing powers of the GPU by creating threads that run simultaneously. Thread groups specify how to organize these spawned threads. In the code above, we are specifying that we want each group of threads to contain 64 threads, which can be accessed like a 2D array.
Determining the optimum size of your thread groups is a complicated issue, and is largely related to your target hardware. In general, think of your gpu as a collection of stream processors, each of which is capable of executing X threads simultaneously. Each processor runs 1 thread group at a time, so ideally you want your thread group to contain X threads to take best advantage of the processor. I’m still at the point where I’m playing with these values to really get a handle on them, so rather than dispense advice on how best to set these values, I’ll leave it up to you to google (and then share on twitter :D ).
The rest of the shader is pretty much regular code. The kernel function determines what pixel it should be working on based on the id of the thread running the function, and writes some data to the Result buffer. Easy right?
Actually Running The Shader
Obviously we can’t attach a compute shader to a mesh and expect it to run, especially since it isn’t working with mesh data. Compute shaders actually need to be set up and called from scripts, which looks like this:
public ComputeShader shader;

void RunShader()
{
int kernelHandle = shader.FindKernel("CSMain");

RenderTexture tex = new RenderTexture(256,256,24);
tex.enableRandomWrite = true;
tex.Create();

shader.SetTexture(kernelHandle, "Result", tex);
shader.Dispatch(kernelHandle, 256/8, 256/8, 1);
}
There are a few things to note here. First is setting the enableRandomWrite flag of your render texture BEFORE you create it. This gives your compute shaders access to write to the texture. If you don’t set this flag you won’t be able to use the texture as a write target for the shader.
Next we need a way to identify what function we want to call in our compute shader. The FindKernel function takes a string name, which corresponds to one of the kernel names we set up at the beginning of our compute shader. Remember, a Compute Shader can have multiple kernels (functions) in a single file.
The ComputeShader.SetTexture call lets us move the data we want to work with from CPU memory to GPU memory. Moving data between memory spaces is what will introduce latency to your program, and the amount of slowdown you see is proportional to the amount of data that you are transferring. For this reason, if you plan on running a compute shader every frame you’ll need to aggressively optimize how much data is actually get operated on.
The three integers passed to the Dispatch call specify the number of thread groups we want to spawn. Recall that each thread group’s size is specified in the numthreads block of the compute shader, so in the above example, the number of total threads we’re spawning is as follows:
This ends up equating to 1 thread per pixel in the render texture, which makes sense given that the kernel function can only operate on 1 pixel per call.
So now that we know how to write a compute shader that can operate on texture memory, let’s see what else we can get these things to do.

Structured Buffers Are Freaking Sweet
Modifying texture data is a bit too much like vert/frag shaders for me to get too excited; it’s time to unshackle our GPU and get it working on arbitrary data. Yes it’s possible, and it’s as awesome as it sounds.
A structured buffer is just an array of data consisting of a single data type. You can make a structured buffer of floats, or one of integers, but not one of floats and integers. You declare a structured buffer in a compute shader like this:
StructuctedBuffer<float> floatBuffer;
RWStructuredBuffer<int> readWriteIntBuffer;
What makes these buffers more interesting though, is the ability for that data type to be a struct, which is what we’ll do for the second (and last) example in this article.
For our example, we’re going to be passing our compute shader a set of points, each of which has a matrix that we want to transform it by. We could accomplish this with 2 separate buffers (one of Vector3s and one of Matrix4x4s), but it’s easier to conceptualize a point/matrix pair if they’re together in a struct, so let’s do that.
In our c# script, we’ll define the data type as follows:
struct VecMatPair
{
public Vector3 point;
public Matrix4x4 matrix;
}
We also need to define this data type inside our shader, but HLSL doesn’t have a Matrix4x4 or Vector3 type. However, it does have data types which map to the same memory layout. Our shader might end up looking like this:
#pragma kernel Multiply

struct VecMatPair
{
	float3 pos;
	float4x4 mat;
};

RWStructuredBuffer<VecMatPair> dataBuffer;

[numthreads(16,1,1)]
void Multiply (uint3 id : SV_DispatchThreadID)
{
    dataBuffer[id.x].pos = mul(dataBuffer[id.x].mat,
    				float4(dataBuffer[id.x].pos, 1.0));
}
Notice that our thread group is now organized as a 1 dimensional array. There is no performance impact regarding the dimensionality of the thread group, so you’re free to choose whatever makes the most sense for your program.
Setting up a structured buffer in a script is a bit different from the texture example we did earlier. For a buffer, you need to specify how many bytes a single element in the buffer is, and store that information along with the data itself inside a compute buffer object. For our example struct, the size in bytes is simply the number of float values we are storing (3 for the vector, 16 for the matrix) multiplied by the size of a float (4 bytes), for a total of 76 bytes in a struct. Setting this up in a compute buffer looks like this:
public ComputeShader shader;

void RunShader()
{
	VecMatPair[] data = new VecMatPair[5];
	//INITIALIZE DATA HERE

	ComputeBuffer buffer = new ComputeBuffer(data.Length, 76);
	buffer.SetData(data);
	int kernel = shader.FindKernel("Multiply");
	shader.SetBuffer(kernel, "dataBuffer", buffer);
	shader.Dispatch(kernel, data.Length, 1,1);
}
Now we need to get this modified data back into a format that we can use in our script. Unlike the example above with a render texture, structured buffers need to explicitly be transferred from the GPU’s memory space back to the CPU. In my experience, this is the spot where you’ll notice the biggest performance hit when using compute shaders, and the only ways I’ve found to mitigate it are to optimize your buffers so that they’re as small as possible while still being useable and to only pull data out of your shader when you absolutely need it.
The actual code to get the data back to the cpu is actually really simple. All you need is an array of the same data type and size as the buffer’s data to write to. If we modified the above script to write the resulting data back to a second array, it might look like this:
public ComputeShader shader;

void RunShader()
{
VecMatPair[] data = new VecMatPair[5];
VecMatPair[] output = new VecMatPair[5];

//INITIALIZE DATA HERE

ComputeBuffer buffer = new ComputeBuffer(data.Length, 76);
buffer.SetData(data);
int kernel = shader.FindKernel("Multiply");
shader.SetBuffer(kernel, "dataBuffer", buffer);
shader.Dispatch(kernel, data.Length, 1,1);
buffer.GetData(output);
}
That’s really all there is to it. You may need to watch the profiler for a bit to get a sense of exactly how much time you’re burning transferring data to and from the cpu, but I’ve found that once you’re operating on a big enough data set compute shaders really pay dividends.
One last thing - once you’re done working with your buffer, you should call buffer.Dispose() to make sure the buffer can be GC’ed. (Thanks to Andreas S for e-mailing me with this addition, and a few other corrections!).
If you have any questions about this (or spot a mistake in what’s here), send me a send me a message on twitter. I won’t write shaders for you, but I’m happy to point you in the right direction for your specific use case. Happy shading!