Using Pixel Shaders with Deferred Lighting in Unity 4
In a previous post (link), I talked about why surface shaders are a great way to write shaders for Unity’s Deferred Lighting rendering path, and they are.
But given the choice, I’d rather write pixel shaders. Surface shaders always felt a little too much like magic for me, and I’ll trade writing more lines of code for more control over what my gpu is doing any day of the week.
For forward rendering, writing pixel shaders is virtually no different from writing shaders for any other engine, however not much information is out there about writing pixel shaders that work with Unity’s deferred lighting system (and more maddeningly, there is no information in Unity’s docs), so this post is going to talk about that.
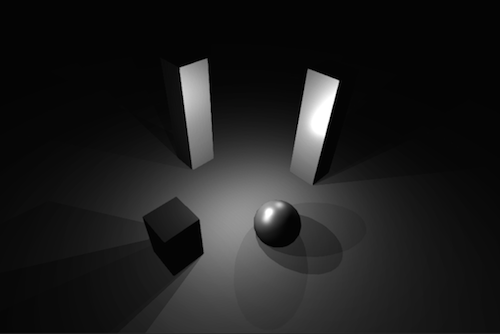 The shader we'll build in this article
Note that this article will not cover how to write custom lighting models for deferred lighting, but rather how to write shaders which use whatever lighting calculations are generated by the deferred lighting system.
I’m also on a mac, and the shader compiler for opengl is way less picky than for directX, so if you hit any snags on windows, send me a message on twitter and we’ll get things sorted out.
The Deferred Lighting Process
If you’re unfamiliar with what Deferred Lighting is, I recommend checking out my earlier post (link), where I go over the differences between deferred and forward rendering. As a quick refresher, Unity’s Deferred lighting system in a 3 step process:
Step 1: Initial data buffers are constructed. These buffers consist of a depth buffer (Z-Buffer), and a buffer containing the specular power and normals of the objects visible to the camera (G-Buffer).
Step 2: the previously built buffers are combined to compute the lighting for each pixel on the screen.
Step 3: all of the objects are drawn again. This time, they are shaded with a combination of the computed lighting from step 2 and their surface properties (texture, colour, lighting function, etc).
When you write surface shaders, you don’t really need to worry about the nuts and bolts of this process, but since we’re using pixel shaders we’re directly responsible for the first and last steps. As such all pixel shaders that work with Deferred Lighting are 2 pass shaders (3 pass if you want to cast shadows).
Our Setup:
We’ll start building our shader with an empty pixel shader skeleton:
Shader "Specular-Deferred"
{
Properties {
	_MainTex ("Base (RGB)", 2D) = "white"{}
	_SpecColor ("Specular Color", Color) = (0.5,0.5,0.5,1)
 	_Shininess ("Shininess", Range(0.01,1)) = 0.078125
}
SubShader{
	Pass{
	}
	Pass{
	}
	Pass{
	}
}
}
Since we want our object to properly cast shadows, we need to write three passes. Note that if you only need your object to receive shadows, you can omit the third pass, since the shadow attenuation will already be factored into the light buffer that Unity builds as during Step 2.
Pass 1: Getting Data Into the G Buffer
The first thing we need to do is make sure that the G-Buffer knows about our object’s shape and specularity so that it can properly calculate lighting for the scene. To do this, we need a pass that outputs the normals and specular values for our object.
To start, we need to let Unity know which pass to use to get this information. Just like with forward rendering, we’re going to use the LightMode tag to assign our passes different roles. In this case, we’ll use “PrePassBase.”
A lot of this pass is very straightforward, since for the most part all we’re doing is outputting normals, but since we also want our objects to be shiny, we need to set the alpha of our fragment shader’s output to our object’s shininess, like so:
Pass{
	Tags {"LightMode" = "PrePassBase"}
	CGPROGRAM
	#pragma vertex vert
	#pragma fragment frag
	uniform float _Shininess;

	struct vIN
	{
		float4 vertex : POSITION;
		float3 normal : NORMAL;
	};
	struct vOUT
	{
		float4 pos : SV_POSITION;
		float3 wNorm : TEXCOORD0;
	};
	vOUT vert(vIN v)
	{
		vOUT o;
		o.pos = mul(UNITY_MATRIX_MVP, v.vertex);
		o.wNorm = mul((float3x3)_Object2World, v.normal);
		return o;
	}

	float4 frag(vOUT i) : COLOR
	{
		float3 norm = (i.wNorm * 0.5) + 0.5;
		return float4(norm, _Shininess);
	}
	ENDCG
}
If you’re a bit confused as to why this pass is necessary, think of Deferred Lighting as though it’s a shader replacement technique. In order to build the GBuffer, the camera renders all the objects in the scene using the PrePassBase pass, and saves this to a render texture. It then uses this data as part of the process of building the lighting buffer.
The line in the fragment function which halves the normal and then adds 0.5 to it just takes each component in the normal and re maps it from the range -1 to +1, to the range 0 to 1 so that it can be stored in a texture.
Pass 2: Getting Data Out of the Light Buffer
Once that lighting buffer is created, our job changes from putting data into it, to getting data out of it.
Just like forward rendering, our second pass uses a different tag, PrePassFinal, to let Unity know to use this pass for the last step of the deferred rendering process. Otherwise, the first few lines of this pass are unremarkable.
Pass{
	Tags{"LightMode" = "PrePassFinal"}
	ZWrite off
	CGPROGRAM
	#pragma vertex vert
	#pragma fragment frag

	sampler2D _MainTex;
	uniform float4 _SpecColor;
	uniform sampler2D _LightBuffer;

	struct vIN
	{
		float4 vertex : POSITION;
		float2 texcoord : TEXCOORD0;
	};

	struct vOUT
	{
		float4 pos : SV_POSITION;
		float2 uv : TEXCOORD0;
		float4 uvProj : TEXCOORD1;
	};
}
The vert function is where things start getting interesting. The fragment function will sample the Light buffer using tex2Dproj, which takes a 4 component vector and divides the xy components by the w component.
Since what we need to do is sample the light buffer at the exact point on the screen that our fragment will be drawn, we have to set our 4 component uv vector to our fragment’s position in clip space. This will let tex2Dproj perform the perspective divide for us, letting us get at exactly the point on the light buffer that we need.
Or rather, that’s the easy way of looking at it. In truth it’s a bit messier than that. Let’s look at what our vertex function ends up being:
vOUT vert(vIN v)
{
	vOUT o;
	o.pos = mul(UNITY_MATRIX_MVP, v.vertex);

	float4 posHalf = o.pos * 0.5;
	posHalf.y *= _ProjectionParams.x;

	o.uvProj.xy = posHalf.xy + float2(posHalf.w, posHalf.w);
	o.uvProj.zw = o.pos.zw;
	o.uv = v.texcoord;

	return o;
}
To start with, we’re halving the clip space coordinates for our projected uvs. I’m assuming this is because the light buffer isn’t actually a screen size texture, but since theres no information available about how Unity’s implementation works under the hood, it’s hard to know for sure.
You could try setting up a deferred lighting scene on an ios device and using Xcode’s gpu capture frame to get at that data, but I don’t have any ios devices in my apartment so I’ll leave that to you (send me a message on twitter if you actually try this :D ).
The Unity docs have this to say about _ProjectionParams:
“x is 1.0 (or –1.0 if currently rendering with a flipped projection matrix), y is the camera’s near plane, z is the camera’s far plane and w is 1/FarPlane.”
So it looks like all that multiplication is doing is making sure that we’re right side up on platforms where rendering to texture flips the image.
I have no idea why we end up adding the halved w component back to our xy components. Again, twitter me if you have any idea.
But now that that’s covered, our fragment function is really straightforward:
float4 frag(vOUT i) : COLOR
{
	float4 light = tex2Dproj(_LightBuffer, i.uvProj);
	float4 logLight = -(log2(max(light, float4(0.001,0.001,0.001,0.001))));
	float4 texCol = tex2D(_MainTex, i.uv);
	return float4((texCol.xyz * light.xyz) + float3(_SpecColor.xyz) * light.w, texCol.w);
}
Notice how unlike forward rendering, we don’t have to do any per light calculations, because they’ve already been done for us, and had the resulting value stored in the light buffer. All we have to do is read from that buffer and multiply our fragment colour accordingly. Just like in the first pass, specular values are stored on the alpha channel of the light buffer.
The logTex calculation feels to me like an implementation specific detail that we don’t really need to worry about, except to know that we have to do it to get values that make sense from Unity. I haven’t built any deferred lighting systems from scratch, so I’m not sure if this is a standard way of storing data in a light buffer or not.
But nevertheless, you should now have a working pixel shader with deferred lighting. How exciting! Only one pass left to go.
Pass 3: Casting Shadows
One of the cooler parts of Deferred Rendering is getting to have point lights cast shadows, but to do that we’ll need another pass. Luckily, this pass is the same as any other shadow caster pass in Unity. In theory could let a fallback handle this for you, but for the sake of having a fully standalone shader, let’s add it here as well.
Pass {
	Name "ShadowCaster"
	Tags { "LightMode" = "ShadowCaster" }

	Fog {Mode Off}
	ZWrite On ZTest LEqual Cull Off
	Offset 1, 1

	CGPROGRAM
	#pragma vertex vert
	#pragma fragment frag
	#pragma multi_compile_shadowcaster
	#include "UnityCG.cginc"

	struct v2f {
		V2F_SHADOW_CASTER;
	};

	v2f vert( appdata_base v )
	{
		v2f o;
		TRANSFER_SHADOW_CASTER(o)
		return o;
	}

	float4 frag( v2f i ) : SV_Target
	{
		SHADOW_CASTER_FRAGMENT(i)
	}
	ENDCG
}
Conclusion
If everything has gone according to plan, you should now have a pixel shader that works with deferred lighting and shadows! If you don’t see your object at all, make sure that you’ve actually switched your camera over to the deferred path (I made that mistake when writing this post).
It’s worth noting that all I did to figure this out was to write surface shaders that only used the deferred lighting path, have them compile down to glsl and figure out what was going on from the compiled shaders.
If you want to learn more (like how to add spherical harmonic lights, or use lightmaps), all you need to do in order to do this yourself is add “exclude_path:forward” to your surface pragma, and add an additional pragma below that, like this:
#pragma surface surf BlinnPhong exclude_path:forward
#pragma only_renderers gles
If you’re on desktop, you’ll need to click the “Show All” button in the inspector to get at the gles code, since gles shaders are meant for mobile devices. If you can read ARB or DirectX assembly, you can do that too, but I find glsl much more readable.
 notice the "Show All" button
If you have any questions about anything, spot a mistake, or just want to say hi, send me a message on twitter. Happy Shading!